Having a fast website is crucial to the success of your website. It impacts user experience, search engine optimisation and conversion rate.
How annoying is it when you visit a website and you sit there staring at a blank screen waiting for it to load? Poor user experience is a big no-no with websites. Google did a study in 2017 that found that as page load time went from 1 second to 3 seconds, the bounce rate increased by 32%!
Following on from that, Google have stated on their website that speed is now a ranking factor for search engine optimisation. I don’t care how amazing your website is, Google have literally said they aren’t going to be sending people your way if your website is too slow.
Slow websites also have an impact on conversion rate and this doesn’t only apply to small businesses. The BBC reported that for every extra second that it took their website to load they were losing 10% of their traffic!
- Walmart had a 2% increase in conversions for every 1-second improvement on-page time.
- Firefox reduced average load time by 2.2 seconds and increased downloads by 15.4%.
- Yahoo increased traffic by 9% for every 400ms of load time improvement
Okay, I’ve made my point, we can all agree that speed matters. But the thing is most people are not aware of what the speed of their website is, or how they can improve. I’m here to change that with my top 5 tips on how to increase website speed.
Image Optimisation
Who doesn’t want to spruce up their website with nice pictures to look at, it would get a bit boring if it was only text.
Yet, one of the biggest causes of a slow website is images. That doesn’t mean you can’t use them (I mean I use them), it just means you need to be smart about what you use.
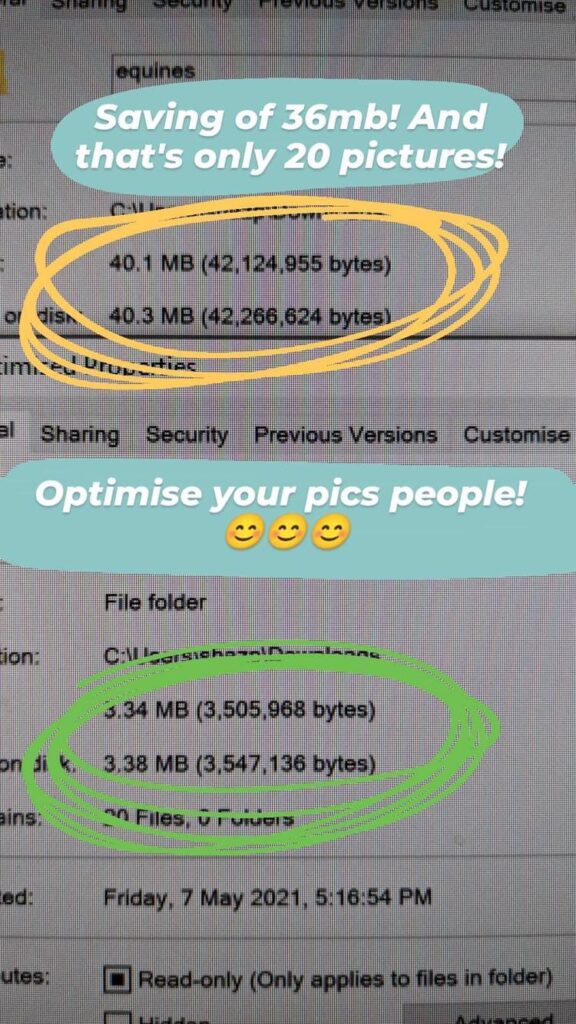
Optimisation is key, I optimise EVERYTHING before upload, those KBS add up. An example of this was a previous client I had who hired me to speed up her website, one of the first things I looked at was the images. She didn’t have a lot on her website but the files were huge!

By following a few simple steps I was able to reduce the image size from 40MB to 3.4MB… that was only 20 images!
Want to know the steps I used to optimise the images for her website? Read the steps outlined below.
Tips for Image Optimisation
- Crop to correct dimensions
If you want to load up a fabulous photo of yourself to put on your about page, and it’s going to be 400×600 pixels. Please tell me why you would upload an image that is 2000×3000 pixels? That’s a whole lot of pixels for no reason. I use Resize Image which is a free Windows App, but you can use whatever software you’re comfortable with. Some free online options are Canva, or https://resizeimage.net/ - Run through TinyPNG
Once your image is cropped to the correct dimensions you want to give it a little boost by compressing the image. Enter TinyPNG. TinyPNG compresses your image without losing the Image Quality. - BONUS: Give the image file an SEO friendly name
While this has no effect on your site speed it’s an important step you should take when uploading images to your website. Make sure you are naming all images with optimised titles before upload. For example, if you are uploading an image of a pink dress rather than keep the image file as IMG_444.jpg you want to call it exactly what it is pink-dress.jpg
Use a Good Web Host
Cheap hosting is the best option for my website performance… said no one ever. I get it, $1/month hosting sounds pretty amazing right? But for what you save in money you are losing in site performance, I’m sure there are exceptions to this… I mean I don’t know any but if you do send them my way, please.
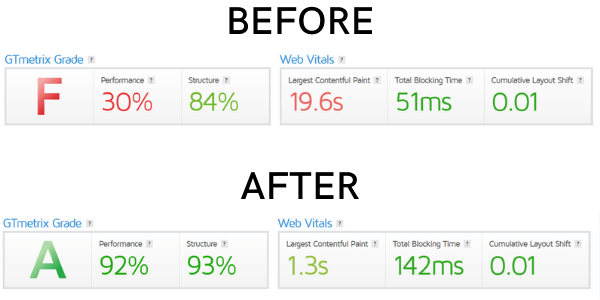
See below for examples of real client sites before and after migrating their website to a better hosting provider.

What’s a good web host? Well, I love and use Cloudways and I recommend them to everyone. I don’t want this to turn into an ‘I love Cloudways‘ post, but honestly, they’re great.
They keep my website and my client’s websites safe, secure, speedy and as an added bonus their support is top-notch!
Install a Caching/Speed Plugin
Cache is the process of storing temporary data for a website, browser, app etc. This is important for websites because rather than loading a page fresh for every time someone new visits your website, caching skips that step and will show visitors a ‘copy’ of a previously loaded screen and as such reduces the load time for a visitor.
Caching plugins are powerful, they give you the ability to control dozens of different settings and as each website is different, each website needs to have different settings configured for it.
Enter my preferred caching plugins:
W3 Total Cache – FREE
WP Rocket – PAID
Install a CDN
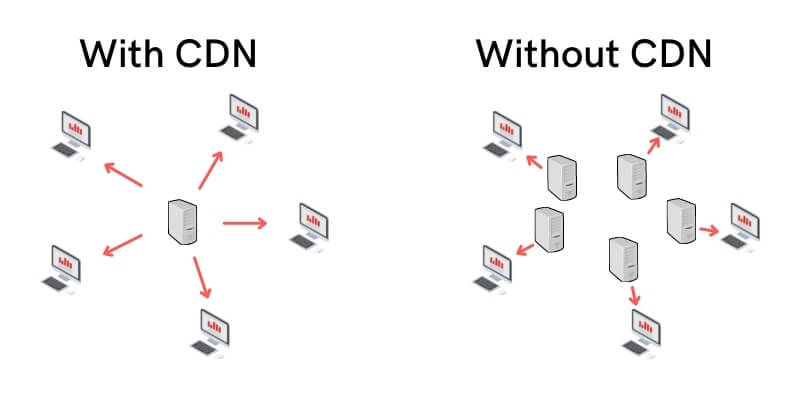
A CDN (Content Delivery Network) speeds up the delivery of content to a website visitor, by using a network of geographically distributed servers. What this means is that if your host server is located in Sydney, Australia and someone is accessing it from the US, rather than the data travelling all the way from Sydney, a CDN can deliver that data from somewhere closer in the US.

CDNs are not only good for site speed, they are also an extra layer of security for your website. My preferred CDN is Cloudflare, they have both free and paid plans available.
Regularly check your website
Websites need ongoing maintenance and if you follow the steps above you’re off to a good start. However, it’s worth your time to run your website through tools such as GT Metrix and Page Speed Insights so you can see how your website is performing and where it can be improved.
Having a fast website is crucial to your visitor’s user experience, search engine optimisation and of course conversion rate. Does your site need speeding up? I offer Site Speed Audits to get you started, or if you’re looking for ongoing site management check out my WordPress Care Plans.


